Adding Parts to a Work Order
This article will provide an overview of how to open a Work Order, add Parts onto the Work Order and Print the Work Order.
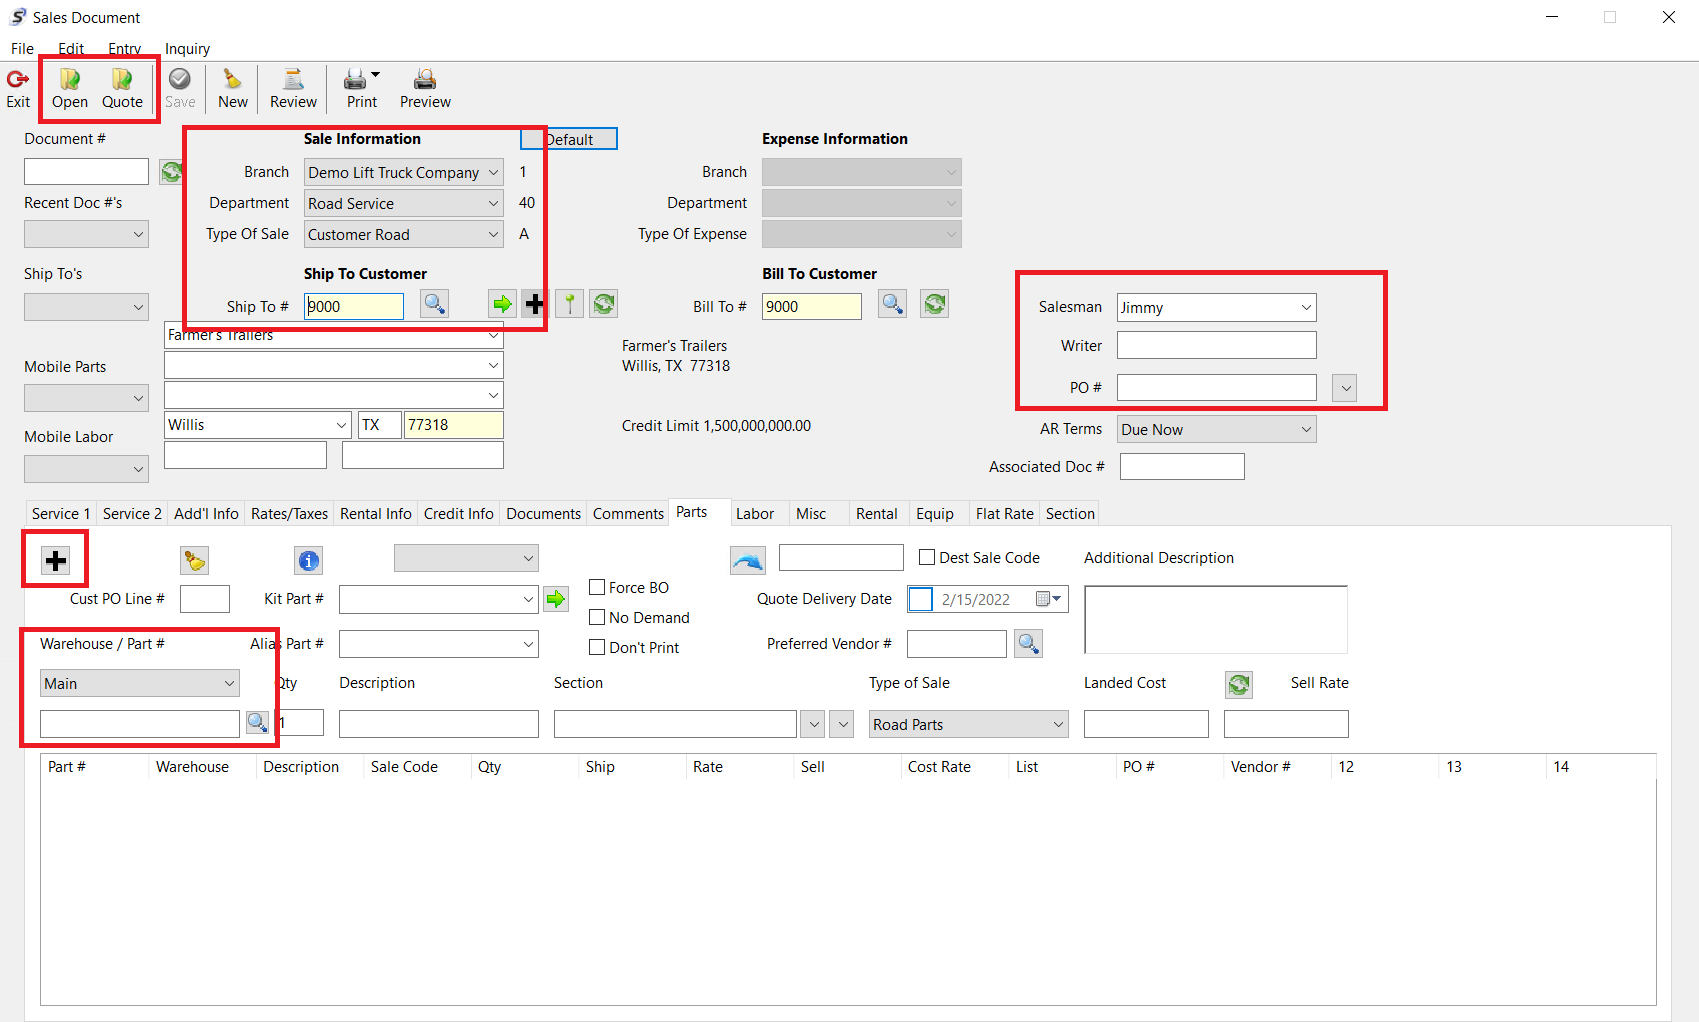
Opening a Work Order
- To open a Work Order, first, click on "Invoicing" in the main menu under the "General" tab.
- Now you should be in the Sales Document window. From here, select your Branch, Department, and Type of Sale.
- Put in the Ship-To Customer Number
- If you don't know the Ship-To Customer Number you can search for the customer by using the magnifying glass to the right of the Ship-To Customer field.
- When you have all the above information populated the “Open” or “Quote” buttons on the toolbar at the top of the window should be enabled and you can select to open a Work Order or create a Quote Work Order that you can later turn into an open Work Order.
- Optional information you may want to add to the Work Order on the Work Order Header before or after opening it could include but not limited to;
- Salesman, Writer and PO #
Adding Parts
- Now that you have an open or quote Work Order, go into the “Parts” tab in the Sales Document window to add and view parts on a Work Order. To add a Part follow the below steps;
- Choose the Warehouse you would like to pull the part from if it isn't already defaulted for you in the lower left hand corner of the Parts Tab.
- Enter the Part Number in the field below the warehouse you want to sell.
- If the Part Number is found as you type it in the Description and Selling Price will be populated.
- If you don't find the part you are looking for you can click on the “Magnifying Glass” to open the “Parts Search” window which will take the value from the Part Number field and search on it.
- In the Parts Search window, search for your part number or description. The Search is a begins with search. If you enter enter a “%” sign in front of behind the Part Number or Description it will serve as a wild card search on the value you entered.
- Once you find your item, either double-click the item, or select the item and click “Ok” to select it into your work order.
- Make sure the item has a Quantity, Description, Type of Sale, and Sell Rate.
- Click on the “Plus Sign ” button in the upper left hand corner of the Parts Tab and that will add the Part on the Work Order.
- If the Part doesn't have enough quantity on hand it will prompt you to backorder the part.
- Follow this process to place in the backorder list for a purchaser to order the part on a Purchase Order.
- The Part will still be added to the Work Order and will be highlighted in light red to indicate it was backordered.
- If there was enough quantity on hand the part when clicking the Plus button it will take that quantity out of stock and add to the Work Order.
- If the Part doesn't have enough quantity on hand it will prompt you to backorder the part.
Print Work Order Documents
- Printing the WO is as easy as clicking on the “Print” icon at the top of the Sales Document window.
- The dropdown will show different printing options that are available;
- Print Document will allow you to print the Work Order as it would look in it's current state.
- If it is Invoiced it will display the Invoice Number.
- If it is a quote it will display as a quote vs. an open Work Order.
- The title of the Work Order will be driven from the Department so that it can identify an Equipment Sales Work Order vs. a Road Service Work Order or a Parts Work Order.
- Print Packing Slip will allow you to print a Packing Slip that can be used to include on Parts Work Orders for parts that will be shipped.
- In an upcoming release we will have a Print Picking List option to allow you to print a Picking List that can be used to pull the Parts for the Work Order.
- Print Document will allow you to print the Work Order as it would look in it's current state.
- Once you have selected the document to print the Page Setup window appear and you can click "Ok" which will then allow you to pick the printer and choose to Print the document.
Was this article helpful?
That’s Great!
Thank you for your feedback
Sorry! We couldn't be helpful
Thank you for your feedback
Feedback sent
We appreciate your effort and will try to fix the article