1. In the Parts Program, click "Add Parts"

2. Each part must have a Warehouse set up, utilize the drop-down menu to select the correct warehouse.
NOTE: If a part number will be in both your "Main" Warehouse and "Van" Warehouses, it must be added separately for each warehouse.

3. Click the "Description" field and enter the description for your part, which will appear on the line items of your invoice if parts detail is included.

4. Click the "Part #" field and enter the part number to be added.

5. Utilize the Parts Group drop-down menu to select the correct Parts Group this part needs to be added to. The Parts Group will determine your markup percentages, auto-ordering preferences, phase in/out, re-price, and demand rating.
*See Set Up Pricing Markups for a Parts Group for further detail on setup.

6. If your parts group uses a "Cost +" markup, click the "Cost" field and enter the dealership's cost incurred for this part.

7. Once your parts costs is entered, the appropriate Real Pricing will be calculated.

8. Click the "On Hand Qty" field and enter the quantity of the part you have on hand.

9. "Absolute Minimum" field represents the minimum quantity of the part record to keep on hand. When running suggested purchase order it will consider the Absolute Minimum if populated to ensure that the quantity ordered at least meets that amount compared to the quantity calculated based on demand.

10. "Package Qty" field is used when a part requires a minimum quantity to be ordered for it to be considered complete or usable. For example, if a repair requires two tilt cylinder seals, setting the Package Qty to two ensures that orders for this part will always meet the necessary quantity for the repair, preventing incomplete or insufficient orders.

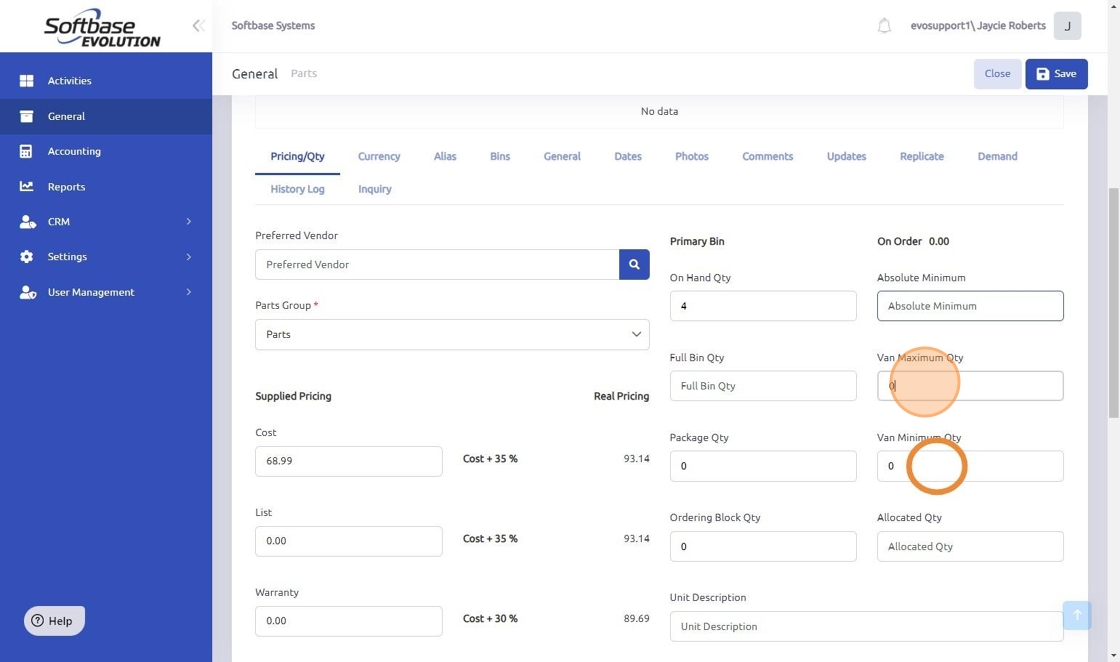
11. If the part will be utilized for replenishing van stock, the "Van Maximum Qty" and "Van Minimum Qty" fields must be populated to ensure correct van stock replenishment.
12. Click the "Bins" tab to add the Primary Bin location, this can be entered to your specifications.

13. If there are alternate bin locations where a part could be located, the alternate location fields can be utilized.

14. If your part requires an extra fee, update the Environmental Fee Description, set the amount, and allocate the funds to the appropriate sales account. Example- Tire Disposal fee.

15. The check boxes at the bottom of the General tab are optional and serve the following purposes:
- Automatic Order: Allows the part to be included in the Auto Stock Purchase Order.
- Serial# Required: Marks the part as requiring a serial number at the time of sale, such as an ECU.
- This Part # is a Core: Indicates the part is a core part, like a battery core.
- This Part # is a Kit: Indicates the part is sold as a kit with other parts.
- No Re-Price: Marks the part as ineligible for pricing updates when a Price File is updated.
- Non-Returnable (manually set): Indicates the part is non-returnable; by default, all parts are returnable.

16. Click "Save"

NOTE: For additional part record tools and details refer to the Tools Available in the Part Record article.
Was this article helpful?
That’s Great!
Thank you for your feedback
Sorry! We couldn't be helpful
Thank you for your feedback
Feedback sent
We appreciate your effort and will try to fix the article