1. Click the "Dispatch" program in the general tab to manage dispatch-related tasks.

2. Click "Work Complete"

3. Each column can be filtered by clicking on the header title, allowing you to organize the data according to your preference.

4. Locate the work order you wish to invoice and click the work order number to open it.

5. SOP may differ from dealership to dealership
Click "Service 1" double check the unit information is correct and the hour meter reading has been updated.

6. Click "Documents"

7. Use the drop-down menu to ensure that the technician recap and/or photos have been uploaded to the Documents tab for the work order.

8. The "Include with customer invoice" checkbox ensures that the technician recap is included and sent with the invoice. Additional checkboxes under the Document Center can be used at your discretion to confirm that all departments have completed their portions of the work order.
For example:
- Billing personnel would check off "Processed Labor" and "Processed Comments" to signify that labor has been added and comments are updated and spell-checked for accuracy.
- Parts department would check off "Processed Parts" to confirm that all posted parts are correct and received.

9. Ensure all comments entered into the public comment section are spell checked and correct.

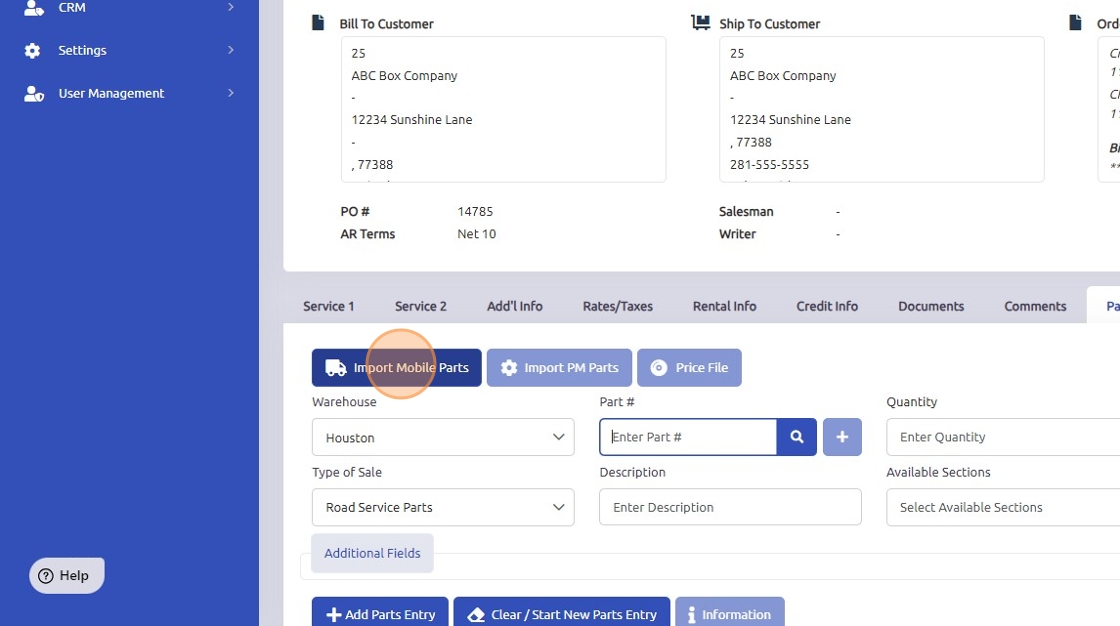
10. Click on the "Parts" tab. Ensure all parts posted have been received; any parts not received will be highlighted in red.
If there are parts that need to be imported from the mobile app, use the "Import Mobile Parts" button and follow the process to import them.
11. Click on the "Labor" tab. If labor entries have already been posted to the work order, verify their accuracy. If labor needs to be imported from the mobile app, click the "Import Labor" button to pull in the labor details.

12. Click on the "Misc" tab. Ensure that any miscellaneous charges are entered and received; any charges not received will be highlighted in red.

13. Click "save" to save all changes made.

14. Once all sections, parts, labor, misc, and departmental charges are correct and the work order is ready to be invoiced, click the "Invoice" button to generate the invoice.

15. Any confirmation pop-ups will appear for verification, such as PO numbers or if there are any discrepancies in parts pricing or entries. Ensure to review and address these before finalizing the invoice.

16. The final confirmation pop-up will ask to confirm that the invoice needs to be created. If everything is correct, click "Yes" to proceed.

17. Once the work order has been invoiced, a confirmation popup will appear. Click "OK" to finalize the process.

20. Once the work order has been invoiced the main work order screen will show "Invoiced" in the top left corner.

Was this article helpful?
That’s Great!
Thank you for your feedback
Sorry! We couldn't be helpful
Thank you for your feedback
Feedback sent
We appreciate your effort and will try to fix the article