1. To make sure the Add Deposit function is available for open documents, the deposit debit and credit accounts must be correctly set up in the Branch Settings.
In Branch Settings click Edit.

2. Click the "Finance" tab.

3. Click the "Enter Deposit Debit Account #" field and enter your deposit, liability, account number.

4. Click the "Enter Deposit Credit Account #" field and enter your accounts receivable account number.

5. Click "Save".

6. Locate the correct document needing a deposit added and click "+ Deposit".

7. Click the "Enter Deposit Amount" field and enter the amount the customer is physically paying you.

8. Click the "Payment Type" drop down menu and select the form of payment.

9. Add any specific notes or comments in the comments section and Click "Add Deposit".

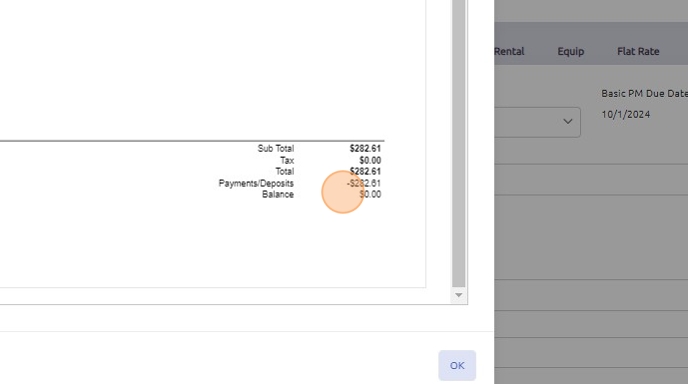
10. Once the deposit has been added it will be notated in the totals section of the document preview. While there is no "receipt" for the deposit paid the preview of the open document can be printed or emailed to the customer showing the deposit.

11. Utilizing the "+ Deposit" function will only allow for one deposit to be applied to a document. The deposit can be reversed if need be by clicking on the "+ Deposit" button and selecting "Reverse Deposit".

12. NOTE: If the deposit paid covers the full amount of the document, once the document is invoiced, no additional accounting functions are required to record the payment.
However, if the deposit is a partial payment, any remaining balances must still be collected and processed through AR Deposits to complete the payment transaction.

Was this article helpful?
That’s Great!
Thank you for your feedback
Sorry! We couldn't be helpful
Thank you for your feedback
Feedback sent
We appreciate your effort and will try to fix the article